
Contents:
- Understanding Slicked-Back Hair: The Basics
- Preparing Your Hair for a Slick Back Style
- Hair Washing and Conditioning
- Detangling
- Choosing the Right Product for Slick Back Hair
- Pomade (Oil-Based or Water-Based)
- Styling Creams and Gels
- What the Pros Know
- How to Do Slick Back Hair: Step-by-Step Technique
- Step 1: Apply Product to Your Scalp and Roots
- Step 2: Distribute Product Through Lengths
- Step 3: Comb Back Smoothly
- Step 4: Define the Parting (Optional)
- Step 5: Set With Hairspray or Heat
- Slick Back Hair for Different Hair Types
- Straight Hair
- Wavy or Loosely Curly Hair (Type 2-3)
- Tightly Curly or Coily Hair (Type 4)
- Maintaining Your Slicked-Back Look Throughout the Day
- Sustainability and Eco-Friendly Slick Back Products
- Common Issues and Troubleshooting
- FAQ
A properly executed slicked-back hairstyle looks effortlessly polished, yet most people try it once, achieve a greasy, flat mess, and abandon the attempt. The difference between a sleek, professional slick back and a failed attempt lies not in hair length or texture, but in technique, product choice, and application method. Master these elements, and you can create a slicked-back look that works for casual Friday office wear or evening events.
QUICK ANSWER FOR SKIMMERS: To do slick back hair: start with clean, slightly damp hair; apply a smoothing cream or pomade to your scalp and hair; comb through with a fine-tooth comb or brush from front to back; secure with hairspray if needed; let it dry or blow-dry for hold. For hold duration, use pomade; for easy removal, use smoothing cream. The entire process takes 3-5 minutes. Full details and product recommendations below.
Understanding Slicked-Back Hair: The Basics
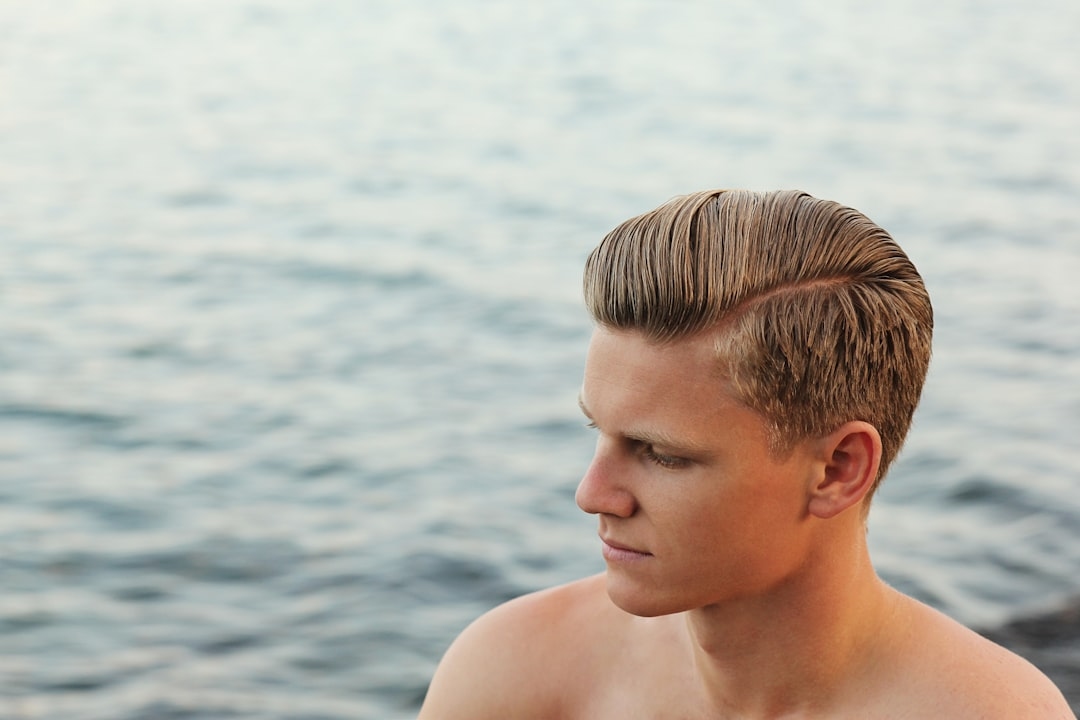
A slicked-back hairstyle pulls hair straight back from the forehead, tightly against the scalp, creating a clean, sculpted appearance. It emphasises face shape, requires healthy-looking hair (flyaways and frizz are immediately visible), and demands consistent product application. Unlike textured hairstyles that hide imperfections, slicked-back hair has nowhere for mistakes to hide.
Slicked-back styling works across all hair types and lengths, from short military cuts to shoulder-length or longer. The technique differs slightly depending on your hair’s natural texture—straight hair is easiest; curly or textured hair requires additional steps to smooth and define. The fundamental principle remains identical: apply product, comb back, and secure with heat or hairspray.
Preparing Your Hair for a Slick Back Style
Hair Washing and Conditioning
Start with clean hair shampooed within the last 48 hours. Hair that’s too fresh from washing is slippery and doesn’t hold product well; hair older than 2 days is slightly oilier and holds product better. If your hair feels dry, use a light conditioner on lengths and ends only, avoiding the scalp (you need scalp hair to grip product).
Towel-dry hair until it’s damp but not dripping wet. Soaking-wet hair won’t hold product; completely dry hair is harder to comb smoothly. The damp state allows product to distribute evenly and combs to glide through without excessive friction.
Detangling
Use a wide-tooth comb or detangling brush to gently work through any tangles, starting at the ends and working upward. This prevents unnecessary breakage and ensures even product distribution later. For textured or curly hair, this step is essential—attempting to comb through dry, textured hair leads to frizz and breakage. Spend 2-3 minutes detangling; patience here creates a smoother final result.
Choosing the Right Product for Slick Back Hair
Product choice determines how long your slick back lasts, how easy it is to wash out, and whether it looks shiny or matte. The main options differ significantly in hold strength and finish.
Pomade (Oil-Based or Water-Based)
Oil-based pomade: Delivers maximum hold and a glossy shine. Products like Brylcreem (£3-4, Boots and Superdrug), Schwarzkopf Osis+ (£8-12), or premium options like Baxter of California (£18-25, Space NK) provide 12-24 hour hold. Oil-based pomades don’t fully wash out with water alone; you need shampoo to remove them completely. Suitable for people wanting long-lasting hold and are willing to commit to proper cleansing.
Water-based pomade: Medium hold with varying shine levels (some matte, some glossy). Brands like Got2b Glued (£2-3, Superdrug), Fudge Urban (£6-8, Space NK), or higher-end options like Oribe Rough Waves Sea Spray (£35, Space NK) provide 6-12 hour hold and wash out easily with regular shampoo. Water-based suits people wanting flexibility and easy removal without over-committing to heavy product.
Styling Creams and Gels
Smoothing creams: Lightweight alternatives to pomade, providing hold and definition without the heavy feel. Products like Carol’s Daughter Black Vanilla Smoothing & Shine Cream (£6-10, Boots) or Cantu Shea Butter Leave-In Conditioning Repair Cream (£4-6, widely available) smooth flyaways and frizz whilst keeping hair light. Hold lasts 6-8 hours; easily removed with water.
Hair gel: Provides excellent hold but can feel crunchy if over-applied. Gel works best combined with another product (apply gel then top with pomade) rather than alone. Brands like Schwarzkopf Osis+ Wet Look Gel (£6-8) or salon-quality options like Kevin Murphy Session Spray (£20+, Space NK) pair well with smoothing creams.
What the Pros Know
Professional hairstylists working in UK salons consistently recommend water-based pomade or smoothing cream for most clients. Oil-based pomade holds longer but requires intentional daily removal (oil buildup is cumulative), whereas water-based products wash out easily, making them ideal for people who change hairstyles frequently or shower daily. One professional hairstylist at Manchester’s Chrome Salon notes: “Ninety percent of people over-apply product. A pomade the size of a pea is enough for a full head; walnut-sized is already excessive. More product doesn’t mean better hold—it means greasier, flatter hair.”
How to Do Slick Back Hair: Step-by-Step Technique
Step 1: Apply Product to Your Scalp and Roots
Warm 1 pea- to walnut-sized amount of product between your palms (size depends on hair density and length—start small). Rub palms together briefly to distribute the product evenly, then apply directly to your scalp from your hairline back towards the crown. Use your fingertips to massage product into roots, working in small sections. Don’t just apply product to the surface; massage it into the scalp and hair roots where hold is needed.
Step 2: Distribute Product Through Lengths
Run your fingers through hair from front to back, distributing product through the lengths. Some stylists comb immediately; others prefer working product through fingers first. Either method works; choose whichever feels more comfortable. Ensure product distribution is even—if you see dry patches or unevenly coated areas, add a tiny bit more product and redistribute.
Step 3: Comb Back Smoothly
Use a fine-tooth comb or slick-back brush (brushes with densely packed bristles designed specifically for this style). Starting from the hairline, comb straight back in smooth, controlled strokes. Comb slowly and deliberately—rushing creates flyaways and uneven direction. Continue combing every 30 seconds until hair is thoroughly combed back and lies flat against your scalp.
For medium to thick hair, use medium pressure; for fine hair, use lighter pressure to avoid breaking strands. Combing typically takes 2-3 minutes; you’re creating a smooth, unified direction, not just pulling a comb through quickly.
Step 4: Define the Parting (Optional)
Some slicked-back styles feature a side parting; others are centre-parted or have no defined parting. If you prefer a parting, use the comb’s handle (the pointed end) to create a clean line from your hairline toward the back of your head. Once the line is established, comb the section on each side of the parting smoothly backward.
Step 5: Set With Hairspray or Heat
For lasting hold, apply hairspray after combing. Use a flexible-hold hairspray (brands like Schwarzkopf Got2b Glued Spiking Glue Spray, £3-4, or Tangle Teezer Hairspray, £6-8, Superdrug) in light mists rather than heavy sprays—heavy application makes hair crunchy and visible. Two light sprays are better than one heavy spray.
Alternatively, blow-dry damp hair pulled straight back. The heat sets the style and can extend hold to 12+ hours compared to 6-8 hours without heat. Use a comb whilst blow-drying to maintain the sleek direction.
Slick Back Hair for Different Hair Types
Straight Hair
Straight hair is naturally slick-back friendly. Apply light product and comb back; minimal technique required. Hold lasts longer on straight hair because the natural hair structure cooperates with backward combing. You can use lighter products than curly-haired people might need.
Wavy or Loosely Curly Hair (Type 2-3)
Wavy hair requires slightly more product and firm combing to smooth waves into the backward direction. Don’t fight the wave pattern; instead, use smoothing cream to define waves whilst pulling them back. The waves won’t disappear, but they’ll be directed backward rather than chaotic. Expect 6-8 hour hold; beyond that, waves tend to reassert themselves.
Tightly Curly or Coily Hair (Type 4)
Tightly curled hair requires additional preparation. Use a smoothing shampoo (products like SheaMoisture Coconut & Hibiscus smoothing shampoo, £5-7, Boots) to begin softening the curl pattern. Apply a heavy smoothing cream or leave-in conditioner to damp hair and blow-dry with a paddle brush, working in sections to gradually smooth the curl. Only then apply pomade and comb back. Hold lasts 4-6 hours; expect to reapply product by evening. This approach respects your hair’s natural texture whilst allowing temporary straightening.
Maintaining Your Slicked-Back Look Throughout the Day
A slicked-back style doesn’t stay perfectly smooth all day without maintenance. Carry a small comb or travel hairspray and refresh every 4-6 hours. If you shower or get caught in rain, the style is essentially reset and requires re-doing. Slicked-back is high-maintenance compared to textured styles—this is the trade-off for the polished appearance.
Sustainability and Eco-Friendly Slick Back Products
If environmental impact concerns you, choose products with sustainable packaging. Refillable pomade and cream containers reduce waste—some UK brands like Honest Grooming (£8-12, online) offer sustainable pomade in refillable tins. Water-based products are more environmentally friendly than oil-based because they wash out without residual water pollution. Natural pomade alternatives using plant-based oils exist (like coconut or jojoba oil-based pomades) but provide less hold and rinse out even more quickly than water-based synthetic pomades.
Common Issues and Troubleshooting
Issue: Greasy, flat hair that doesn’t look polished. You’re using too much product. Reduce to a pea-sized amount; more product doesn’t create better results.
Issue: Flyaways visible throughout the day. Your product doesn’t have enough hold. Upgrade to oil-based pomade or use hairspray additionally. Alternatively, your hair is drying out (moisture deficit), which causes flyaway frizz; add a smoothing serum before applying product.
Issue: Hair breaking when combing. You’re combing too aggressively. Use lighter pressure and detangle more thoroughly before applying product and combing back.
Issue: Product feels crunchy or stiff. You’ve applied too much product or used product with excessive hold. Use less and choose water-based products or smoothing creams instead of heavy pomade.
FAQ
How long does a slicked-back hairstyle last?
Depends on product and conditions. Oil-based pomade lasts 12-24 hours; water-based pomade 6-12 hours; smoothing cream 6-8 hours. Humidity, wind, and activity reduce duration. Most people re-do slicked-back styles daily or refresh mid-day.
What’s the best product for slick back hair?
Water-based pomade (Got2b Glued, Fudge Urban, or premium options) balances hold and easy removal. For extreme hold, oil-based pomade (Brylcreem, Schwarzkopf Osis+). For lightweight, low-commitment options, smoothing creams work equally well.
Can you do slick back hair with short hair?
Yes. Short hair (1-3 inches) slicks back beautifully with proper product. Longer hair requires more product and combing; shorter hair is actually easier to achieve perfectly smooth slick-backs.
Does slick back hair damage your hair?
Slicked-back styling itself doesn’t damage hair if you use products that wash out easily and comb gently. Damaging occurs from over-combing aggressively, using excessive product that isn’t removed daily, or pulling hair so tightly that tension headaches occur. Moderate, consistent slick-back styling is safe.
Is slick back hair appropriate for work?
Absolutely. Slicked-back is professional, polished, and appropriate for office environments, client meetings, and formal events. It’s actually preferred to messy or textured styles in many professional UK contexts.
A slicked-back hairstyle requires minimal time once you understand the technique and choose appropriate product. Unlike elaborate textured styles requiring blow-dry styling and multiple products, slicked-back needs only one product and a comb. Invest 5 minutes each morning, and you’ll look polished all day. The key is starting with the right product for your hair type and not over-applying—these two elements determine whether you achieve effortless elegance or awkward greasiness.